In a world increasingly dominated by automation, robotics, and artificial intelligence, it might seem surprising that some of the most critical and complex electronic assemblies in existence are still built — at least in part — by human hands. Manual PCB assembly is not a relic of the past. Far from it. It remains an essential, highly skilled, and irreplaceable part of the electronics manufacturing industry, playing a vital role in prototype development, low-volume production, complex assemblies, and repair and rework operations around the world.
In this article, we’ll explore what manual PCB assembly is, when and why it’s used, how it works, what skills it demands, and how it fits alongside automated assembly in today’s electronics manufacturing landscape.
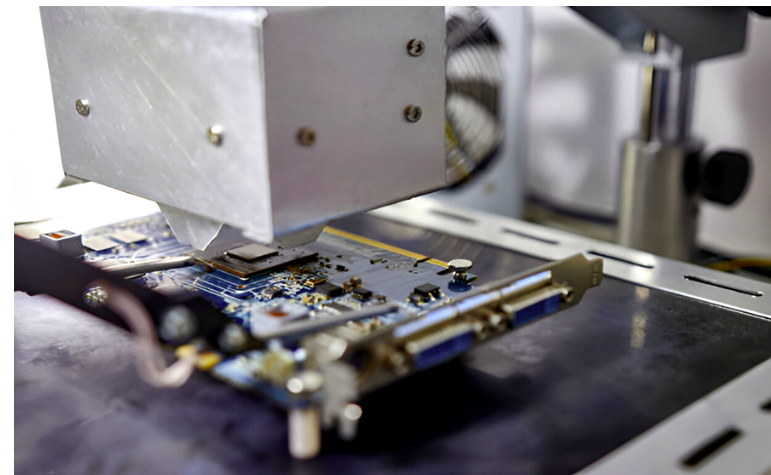
What Is Manual PCB Assembly?
Manual PCB assembly is the process of placing and soldering electronic components onto a printed circuit board (PCB) by hand, using skilled technicians rather than automated machinery. Instead of pick-and-place robots and reflow ovens doing all the work, trained assemblers use soldering irons, tweezers, magnification equipment, and a steady hand to build circuit boards one component at a time.
This doesn’t mean manual assembly is primitive or imprecise. On the contrary, skilled PCB assembly technicians are capable of working with extremely small components, complex board layouts, and demanding specifications that would challenge even the most advanced automated systems. Manual assembly requires a combination of deep technical knowledge, excellent hand-eye coordination, patience, and meticulous attention to detail.
When Is Manual PCB Assembly Used?
Automation is faster and more consistent for high-volume, repetitive production runs. So why does manual assembly still exist, and when does it make more sense than automated methods?
Prototype and Low-Volume Production When a design team needs just one or a handful of boards to test a new concept, setting up automated pick-and-place machines and programming them for a single run is often impractical and cost-prohibitive. Manual assembly allows engineers to build prototype boards quickly and affordably, making it the go-to method for early-stage product development.
Complex or Unusual Components Some components simply cannot be handled by automated equipment. Unusually large parts, oddly shaped connectors, components with non-standard lead configurations, or parts that require precise manual adjustment during placement all fall into this category. Skilled technicians can work with these components in ways that machines cannot.
Through-Hole Components in Mixed Assemblies While wave soldering can handle many through-hole components, certain through-hole parts in mixed-technology assemblies — where both SMT and through-hole components are present — are more efficiently and accurately placed and soldered by hand, particularly when only a few such components appear on an otherwise SMT-dominated board.
Rework and Repair When an assembled board fails inspection or testing, rework is required. Removing a misplaced component, reflowing a cold solder joint, or replacing a damaged part are tasks that demand the precision and judgment of a skilled human technician. Rework is one of the most common and important applications of manual assembly skills.
Sensitive or High-Value Components Some components are too delicate, too expensive, or too sensitive to risk damaging in an automated process. Manual placement and soldering by an experienced technician minimizes the risk of damage to these high-value parts.
Specialist and Low-Volume Industries In industries such as aerospace, defense, medical devices, and research equipment, production volumes are often low and specifications are extremely demanding. Manual assembly, performed by highly trained and certified technicians following strict procedures, is often the preferred — or required — approach.
The Manual PCB Assembly Process
Manual PCB assembly follows a structured process to ensure accuracy, quality, and consistency. Here’s how a typical manual assembly workflow looks:
Step 1: Preparation and Documentation Review Before any soldering begins, the technician reviews the assembly documentation — including the Bill of Materials (BOM), assembly drawings, and any special instructions. Understanding exactly which components go where, in what orientation, and with what specifications is essential before picking up a soldering iron.
Step 2: Workstation Setup A proper manual assembly workstation includes a temperature-controlled soldering iron, magnification — either a magnifying glass, stereo microscope, or digital inspection camera — good lighting, ESD (electrostatic discharge) protection including a grounded mat and wrist strap, and all the necessary tools such as tweezers, flux, solder wire, desoldering braid, and cleaning supplies.
ESD protection is non-negotiable. Many electronic components are sensitive to static electricity, and without proper ESD precautions, invisible damage can occur that leads to premature field failures.
Step 3: Component Identification and Kitting The technician identifies and organizes all required components according to the BOM. Components are verified against their specifications — checking part numbers, values, and polarities — before assembly begins. This step is critical for preventing errors that are difficult and costly to correct after soldering.
Step 4: Component Placement and Soldering For through-hole components, the technician inserts the component leads through the appropriate holes in the board, bends them slightly to hold the component in place, and solders each lead to its pad on the underside of the board. For surface mount components being placed manually, the technician applies a small amount of solder or solder paste to the pad, positions the component precisely using tweezers, and solders it in place using a fine-tipped soldering iron or hot air rework station.
The quality of a solder joint depends on several factors — the correct amount of solder, the right temperature, adequate heat applied to both the component lead and the pad, and smooth, steady technique. A good solder joint is shiny, smooth, and concave in shape. A cold or dry solder joint — caused by insufficient heat or movement during cooling — appears dull and grainy, and may fail electrically.
Step 5: Flux Cleaning After soldering, flux residue is cleaned from the board using appropriate cleaning agents — isopropyl alcohol, flux remover, or an ultrasonic cleaning system, depending on the type of flux used and the application requirements. Leaving flux residue on the board can cause corrosion or electrical leakage over time, particularly in high-humidity environments.
Step 6: Visual Inspection Each assembled board is visually inspected — often under magnification — to check every solder joint for quality, verify that all components are correctly placed and oriented, and look for any signs of damage, bridging, or missing components. This step requires a trained eye and a thorough, systematic approach.
Step 7: Testing After visual inspection, the board is tested to verify electrical performance. Depending on the application, this may involve continuity testing, in-circuit testing, functional testing, or a combination of all three. Any boards that fail testing are sent for rework.
The Skills Required for Manual PCB Assembly
Manual PCB assembly is a skilled trade that takes time and practice to master. Key skills include:
Soldering Technique: The ability to apply the right amount of heat and solder to create clean, reliable joints consistently — even on very small components — is the core skill of any PCB assembler. It requires steady hands, good hand-eye coordination, and a thorough understanding of how different materials behave under heat.
Component Knowledge: Technicians must be able to identify a wide variety of electronic components, understand their specifications, and recognize correct polarity and orientation. Placing a component backwards or using the wrong value can render an entire board non-functional.
Reading Technical Documentation: Assembly drawings, BOMs, and schematic diagrams are the roadmaps of PCB assembly. The ability to read and interpret these documents accurately is essential.
Attention to Detail: Manual assembly is an exacting process where small mistakes can have significant consequences. The ability to work carefully, methodically, and without losing concentration over extended periods is a critical attribute for any skilled assembler.
Problem Solving: When something doesn’t look right — a component that doesn’t fit, a solder joint that won’t flow properly, a board that fails testing — technicians must be able to diagnose the issue and find an appropriate solution.
Manual Assembly and Quality Standards
In many industries, manual PCB assembly is governed by strict quality standards that define exactly what constitutes an acceptable solder joint, how components should be placed, and what inspection criteria must be met. The most widely recognized standard for electronic assembly quality is IPC-A-610 — Acceptability of Electronic Assemblies, published by IPC (the Association Connecting Electronics Industries).
IPC-A-610 defines three classes of assembly quality:
- Class 1: General electronics where the primary requirement is function of the completed assembly
- Class 2: Dedicated service electronics where continued performance and extended life are required, and for which uninterrupted service is desired but not critical
- Class 3: High-performance and harsh environment electronics where high levels of assurance are required, and the equipment must function when required, such as life support or aerospace systems
For manual assembly in demanding industries, Class 3 compliance is often required — meaning every solder joint, every component placement, and every inspection must meet the highest standards in the industry.
Manual Assembly vs. Automated Assembly
Manual and automated PCB assembly are not competitors — they are complementary. Here’s a simple comparison:
Manual assembly excels at: Prototypes and low volumes, complex or unusual components, through-hole assembly in mixed-technology boards, rework and repair, and high-mix low-volume production where frequent changeovers make automation impractical.
Automated assembly excels at: High-volume production of consistent designs, placement of large numbers of small SMT components at high speed, repeatable processes where consistency is critical, and applications where labor costs must be minimized at scale.
The most capable electronics manufacturers use both approaches — deploying automation where it adds the most value, and relying on skilled manual assemblers where human judgment, dexterity, and flexibility are needed.
Conclusion
Manual PCB assembly is far more than a fallback for when machines aren’t available. It is a skilled, disciplined, and indispensable part of the electronics manufacturing ecosystem — one that delivers precision, flexibility, and quality in situations where automation simply cannot. From the earliest prototype of a new product to the most demanding aerospace and defense applications, manual assembly remains a cornerstone of how the world’s most important electronic systems are built. For companies requiring the highest standards of manual assembly craftsmanship alongside world-class manufacturing infrastructure, China aerospace PCB assembly providers offer a compelling combination of IPC-certified technicians, rigorous quality management systems, advanced inspection capabilities, and the experience needed to meet even the most exacting specifications in the most demanding industries.